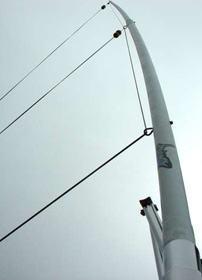
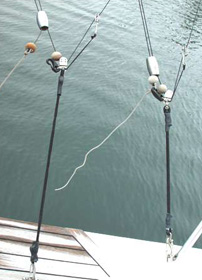
03. Outrigger Setup and Taglines
Between The Lines - Ch10: Boat Setup
Setting up and using taglines is easy, fast and very effective. Although there are no statistics to show that using taglines results in a better hook-up rate than other systems, the logic in their use to minimise slack line is compelling. (Vid 01)
Vid 1
The fish is generally hooked during the time it takes to close its mouth, allowing the lure and hooks to slide through its mouth enough to hook the fish. If the fish closes its mouth when there is slack line, the hooks may well not have enough pressure to penetrate the desired target of their top or bottom jaw. Once shut, the roughness of the jaw and muscle pressure make pulling a lure and its hooks through its mouth highly unlikely. The significant difference between lure and bait is that the fish is unlikely to swallow a lure if slack line is fed to the fish. If the hooks do not at least start to go in, the next time the opportunity to hook the fish is when the fish opens its mouth it will more than likely spit the lure. This can be quite some distance from the boat at the end of its first run. At this distance, there is likely to be a great deal of stretch and belly in the line, cushioning the force of the drag to get the hooks to penetrate.
TAGLINE SETUP
Taglines may look complicated enough to intimidate a novice, but they are quite simple to understand by examining the individual components. Understanding each of the items will help in setting up most other outrigger systems.
Bottom End of Outrigger and Tagline Setup
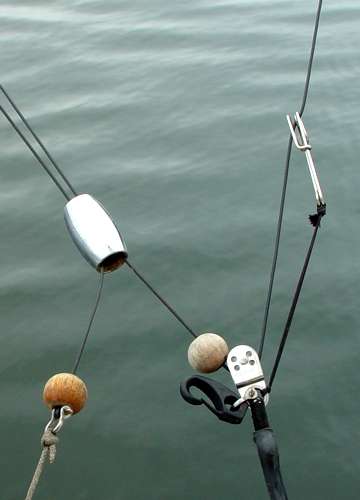
1- Main Halyard: The main halyard (outrigger line) can be any twine or braided cord. When using taglines a smooth-surfaced material such as nylon is used to allow the tagline return to run up and down smoothly. Leader material of around 400lb to 600lb will usually last around two years exposed to the sun and weather.
 |
 |
 |
| 2-Pulley | 3-Tensioning Cord | 4- Tagline Return |
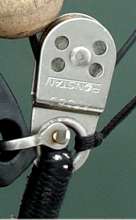
2- Pulley
A small pulley is used at either end to reduce friction and allow the main halyard to be raised and lowered easily under load.
 3- Tensioning Cord
A tensioning cord is used to load the rigger cords to lessen the chance of the clip or rigger sliding down the pole under the drag pressure of the lures or baits being towed when there is a strike. The tensioning cord can be any system that does the job such as stretched shock cord or a rope and jam cleat. When the outrigger is being used the halyard and tagline should be within easy reach of the crew. This can mean it will be in the way at other times such as when fighting fish, getting on and off the boat, or accessing the side of the boat. It is therefore advisable to be able to stow the tensioning cord out of the way, for example on the outrigger base by using a clip to hold it in place.
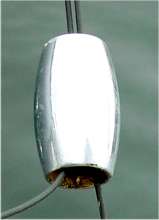
4- Tagline Return
A tagline return is merely something relatively heavy with a hole in the middle through which you thread both the running line and tagline. The system is based on gravity; the higher the angle of the rigger the more effective tagline returns can be and the lighter the weight needed. If the riggers are straight out at 180 degrees to the boat, returns may not be effective. Using silicone grease on the main halyard and tagline can lessen friction and increase the tagline return's effectiveness.
To make the tagline system almost automatic we incorporate a tagline return into the rigging of the tagline. When the tagline is connected, the trolling line is let out, and the return rides up the outrigger halyard as the tagline takes up the weight of the lure. After a strike, the return slides down the running line pulling in the tagline. The danger of not using a return is that after a strike the tagline is free to whip all over the place with the risk of tangling in the fishing lines and around the outrigger and halyard and to retrieve the tagline by pulling down the main halyard takes valuable time. The tagline return simply eliminates these problems.
Vid 2
|
|
||||||
|
The length of the tagline is not critical, but it should be long enough to reach the tip of the rod you are going to attach the line to. As mentioned earlier the longer the tagline the less drop back. A practical length is the distance from the tip of the outrigger to the middle of the stern. This allows the tagline to be used on any rod on that side of the boat. |
||||||
|
|
||||||
8- Tagline Using a piece of cord also has the benefit of seeing if the lure is spinning, creating line twist which can cause the line to twist up the tag cord. If you use a clip the twisted line may go unnoticed resulting in weakened line and busted line for no apparent reason or it may tangle around the clip causing abrasion or nicks in the line. |
||||||
|
Alternative methods include simply tying a rubber band around both strands of the main halyard above the small pulley. |
||||||
|
|
||||||
|
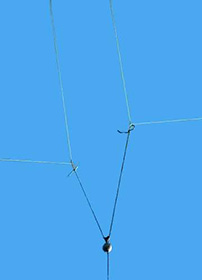
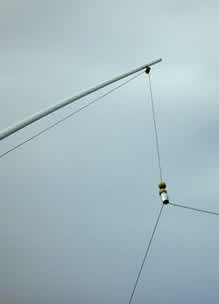
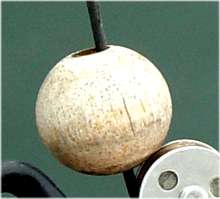
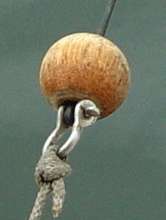
The upper cork ball prevents the tagline and halyard from jamming in the outrigger tip pulley. Below the upper cork ball is the connection point where the main halyard end loops join via a very small shackle. The tagline is also connected to this shackle. By using a small shackle it is quite easy to insert other types of release mechanisms to replace the tagline. The lower cork ball is held in place by tying it to the small connection shackle. This ball prevents the tagline return from getting caught up on the halyard and tagline joining loops. Once you have mastered the use of individual outrigger halyards and taglines you may wish to increase lure adjustment (Fig 1) possibilities by adding extra halyards (Fig 2) and taglines to each rigger. Just keep in mind that using these extra adjustments means it not only takes more time to set up the lure pattern, it also takes more time to retrieve them when a fish has hooked up. Once you have mastered multiple halyards and taglines you can also have an option of running multiple tag ends on each tagline. (Fig 3) |
||||||
|
Running Tagline Instructions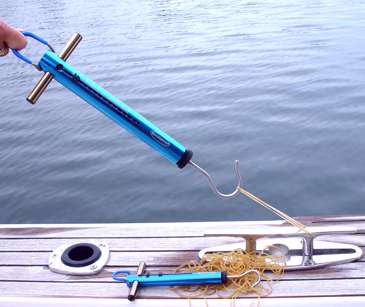
In this exercise, we will be using rubber bands to connect the mainline to the tagline. The first thing to check is their breaking strain before you use them. Their strength and elasticity vary from brand to brand, batch to batch and exposure to air, salt and sun will also affect them. Even very thin bands may have a very high breaking strain. You will be surprised how strong they are. Note if you check a band with one end looped over the scales, and the other over a cleat, and say it breaks at 2kg, then when you put the band on the line and put both ends back to the tag line it will be two ends at 2kg equaling 4kg.
It is advisable to have a good selection of band lengths and widths so you can choose the appropriate size to give you the release you wish. For consistency, the release setting should be approximately the reels' strike drag. If you use adjustable clips you should also check their release pressures.
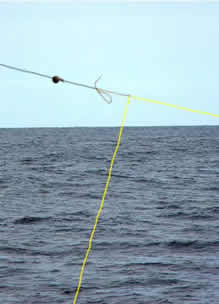
To attach the trolling line to the tagline stretch the band and wind it around the trolling line at least ten times, or more if you wish. The purpose of using this many turns is to prevent the mainline slipping through the rubber band which will weaken it significantly.
Next, wind one end back over the other and pass one end of the band through the other and attach only one end to the tagline.
Or alternativel,y pass the end of the tagline through both loops of the rubber band if you want double the breaking strain of the rubber band. (Vid 3) Let enough line out between the rod and tagline to allow the tagline to run in line with the lure plus add a little slack. The rubber band should break free before there is any force on the rod. The breaking strain of the band plus the reel drag setting may be enough to break the line if both loads happen at the same time. This is really only a concern if using soft sloppy outriggers.
Vid 3
Note that if both ends go to the tagline the band will come away on strike; and if only one end comes back to the tagline the broken band will most likely remain on the line after strike.
To release the line, you simply pull the tag end and the tagline is free with minimal fuss when the skipper is screaming to get the lines so he can get the boat after a fish on a screaming run. (Vid 4)
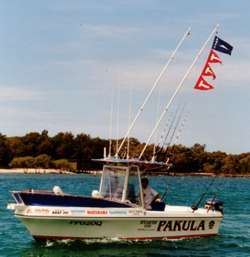
If for no other reason, outriggers are great for flying those little red tag flags on the way home after a successful day's fishing.
Vid 4


 5- Ball on Halyard
 6- Tagline Halyard
 7- Tagline Ball
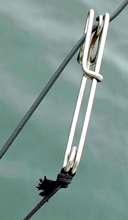 9- Anti-Slip Clip
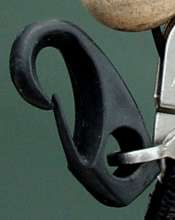 10- Retaining Clip
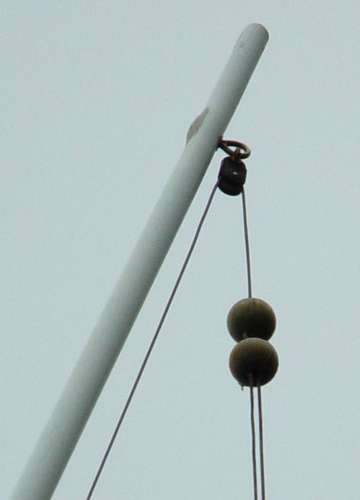 11- Top End of Outrigger and Tagline Setup